

Monday, June 30, 2008
Saturday, June 28, 2008


Tuesday, June 24, 2008


Monday, June 23, 2008
Photoshop Tutorial #1
Even with a DSLR, photos don't always come out as perfect as you'd like. Here's a simple way to saturate the photo with more color and contrast to make it pop!
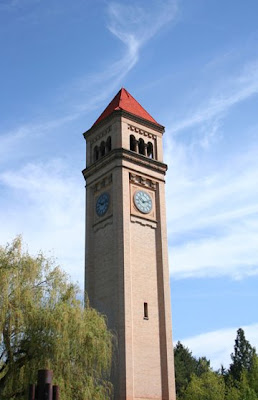
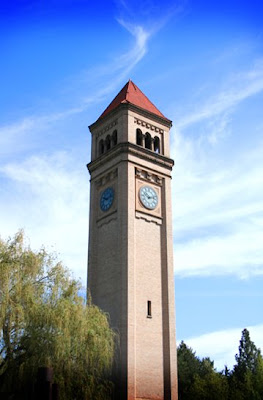
Original photo-SOOTC (straight out of the camera).
First thing I did was to straighten the image simply by selecting all and slightly rotating.

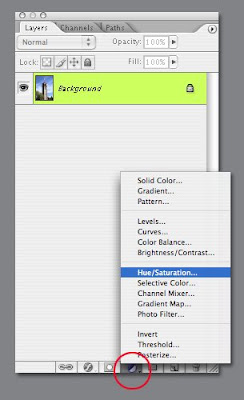
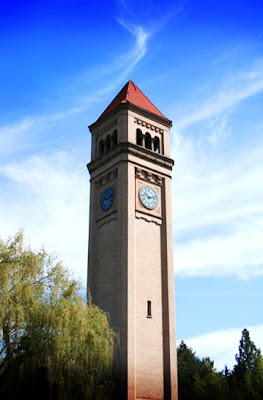
Next thing to do is to click on the half circle icon on the bottom of the layers window to bring up the Hue/Saturation adjuster.
Then select the 'Reds' and move the 'saturation' slider to the right.

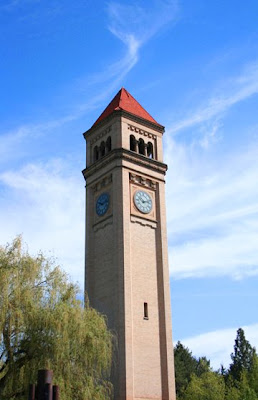
Now the triangular roof is already a richer red.
Do the same with the 'Blues' and pump up the saturation. Then flatten layers.
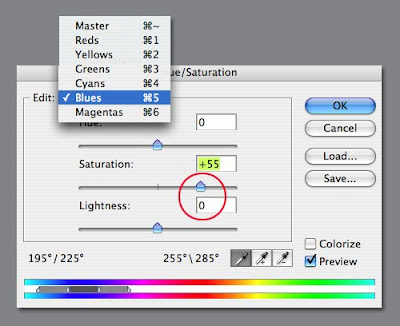
The sky is now a brighter and prettier blue.
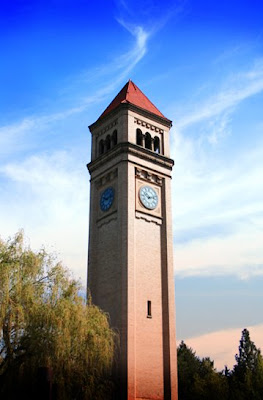
Now take the 'burn' tool and select a fairly large brush and burn the top and bottom of the photo.
Then duplicate the layer (command J) and put the layer mode on 'soft light' at 50% opacity.
Looks so much better than the original, but I'm gonna keep going for the extra oomph.
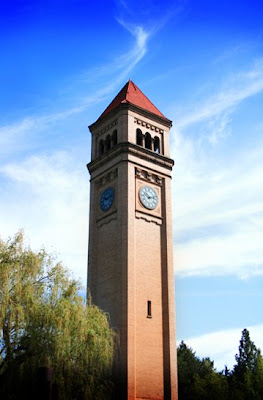
Create a new layer. Select an orange color, then take the gradient tool and make sure the gradient is set on the foreground (orange) color to clear.
Click and drag from the bottom up to about half way up and release the click.
Set the layer mode to 'multiply' and at 50% opacity.

You'll see the gradient on the bottom like the below pic.
Now take the eraser tool with a large brush and erase around the structure, so the background sky isn't orange and that's the final step! I like the results, so I'm gonna stop here.

Original photo-SOOTC (straight out of the camera).
First thing I did was to straighten the image simply by selecting all and slightly rotating.

Next thing to do is to click on the half circle icon on the bottom of the layers window to bring up the Hue/Saturation adjuster.

Then select the 'Reds' and move the 'saturation' slider to the right.

Now the triangular roof is already a richer red.

Do the same with the 'Blues' and pump up the saturation. Then flatten layers.

The sky is now a brighter and prettier blue.

Now take the 'burn' tool and select a fairly large brush and burn the top and bottom of the photo.

Then duplicate the layer (command J) and put the layer mode on 'soft light' at 50% opacity.

Looks so much better than the original, but I'm gonna keep going for the extra oomph.
Create a new layer. Select an orange color, then take the gradient tool and make sure the gradient is set on the foreground (orange) color to clear.
Click and drag from the bottom up to about half way up and release the click.
Set the layer mode to 'multiply' and at 50% opacity.

You'll see the gradient on the bottom like the below pic.

Now take the eraser tool with a large brush and erase around the structure, so the background sky isn't orange and that's the final step! I like the results, so I'm gonna stop here.


Sunday, June 22, 2008


Subscribe to:
Posts (Atom)


